Эта страница также доступна на русском языке.
- Plugin Installation
- Initial Setup
- The Plugin’s Use
- Advanced Options
- API description
- Problems and Solutions
1 Plugin Installation
Installation of the plugin is not different from installing other plugins for WordPress.
Unpack zip file and upload the files to the folder /wp-content/plugins/ of your site. Then activate the plugin through the Control Panel.
You can also install the archived plugin (zip file) using the Upload Plugin button in the menu Appearance / Plugins / Add New. (Recommended)
Congratulations! WP FullText Search plugin is installed on your website.
2 Initial Setup
Immediately after installation, the plugin will automatically create all necessary files and database tables. However, if the plugin was installed for the first time, it will need to create the search index based on your website’s published posts. There is no need for concern, this process won’t change your data.
In order to create the initial search index simply open the settings page of the plugin via the menu “Settings / WP FullText Search“, and the indexing process will start automatically. It is better to wait until the search indexing process has completed before working on your site as the process will place some strain on the server and the navigation on the admin panel of WordPress can be quite problematic until it is done.
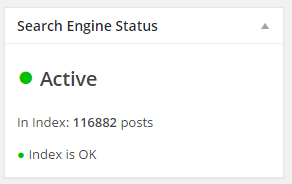
After the indexing process has completed, the status box should look like this:
3 The Plugin’s Use
The plugin replaces the WordPress standard text search option with a better one so that you use the created index for searching instead of the default limited search option. This is why you don’t have to change anything to use the plugin correctly after installation. New posts will be added to the new search index automatically. Changes in the already published posts will also be automatically updated in the search index.
If all you need is the faster search system on your website you can close your settings off here or you can go to Advanced Options that significantly expand the plugin’s range of application.
4 Advanced Options
4.1 Cluster-Based Search System
All data in the search index of WP FullText Search are divided into virtual clusters. For each post, there is a relevant cluster of data. Each cluster has its own weight coefficient that is used as a multiplier to calculate the relevance of the post in search results.
You can set weight coefficients on the page “Default Settings” of the plugin.
By default, the index has only two clusters – post_title (that keeps the data related to the indexed titles of posts) and post_content (that keeps the data related to the indexed content of all posts with stripped-out HTML tags). Using the default settings the plugin finds the same posts that the standard search system of WordPress would find. The cluster titles (post_title, post_content) are also called “tokens”.
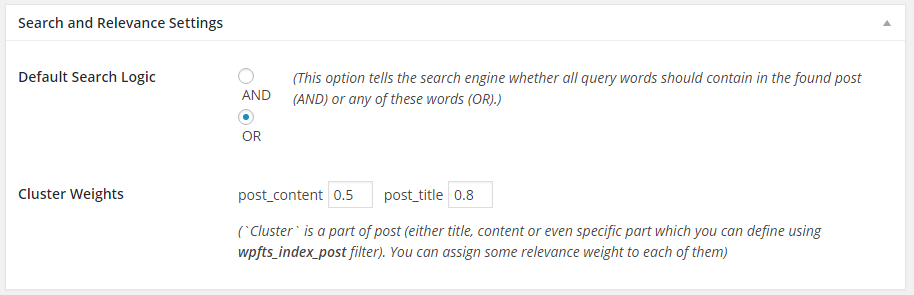
You can create an endless amount of new clusters and set up different weight coefficients for them. In this way, you will significantly expand the search opportunities on your website and adjust the search system to your own preferences.
See below for the use of additional clusters for the implementation of search in the metadata of posts and in the dynamically generated data.
4.2 Adding Post Meta Data to Search Index
Let’s take a look at using WP FullText Search plugin with a theoretical example.
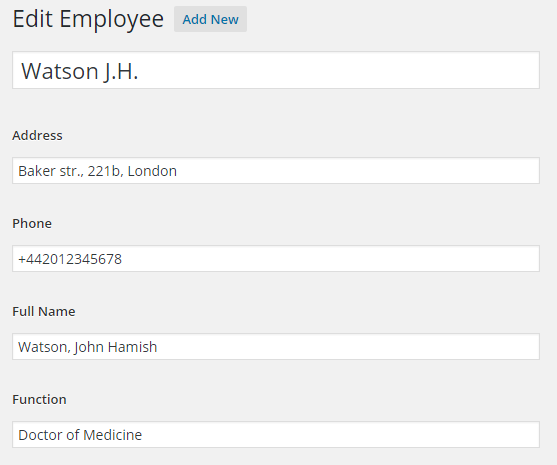
Suppose, you have posts of the type “employee”, keeping data about employees in additional meta fields. (By the way, to create the special types for WP posts we recommend using free plugins such as ACF Advanced Custom Fields and Custom Post Type UI). These fields could look like this:
- address = “Baker str., 221b, London” // home address of employee
- phone = “+442012345678” // phone number
- name = “Watson, John Hamish” // full name
- function = “Doctor of Medicine” // position or profession
(We could have an enormous list of fields, but for a simple demonstration these ones will be enough). Let’s save this post with the title post_title = “Watson J.H.” and blank value of post_content.
So, you want to have an opportunity to search for employees using the content of these fields and the standard functions: WP_Query or get_posts(). If you don’t plan to set up a separate weight coefficient to each field, then you can simply merge data into one field and then save it in a common cluster with the name/token “employee_data” (for example).
That is how the filter’s code will look like for this example (it has to be placed into the file functions.php of your site’s current theme).
/**
 * This snippet adds metadata of "employee" post to search index
 */
add_filter('wpfts_index_post', function($index, $post)
{
    global $wpdb;

    // Basic tokens
    /*
     * This piece of code was commented out intentionally to display things
     * which was already done before in the caller code
    $index['post_title'] = $post->post_title;
    $index['post_content'] = strip_tags($post->post_content);
    */
    if ($post->post_type == 'employee') {
        // Adding new token "employee_data" specially for posts of type "employee"
        $data = array();
        $data[] = get_post_meta($post->ID, 'address', true);
        $data[] = get_post_meta($post->ID, 'phone', true);
        $data[] = get_post_meta($post->ID, 'name', true);
        $data[] = get_post_meta($post->ID, 'function', true);
        $index['employee_data'] = implode(' ', $data);
    }
    return $index;
}, 3, 2);
4.3 Testing the Filter
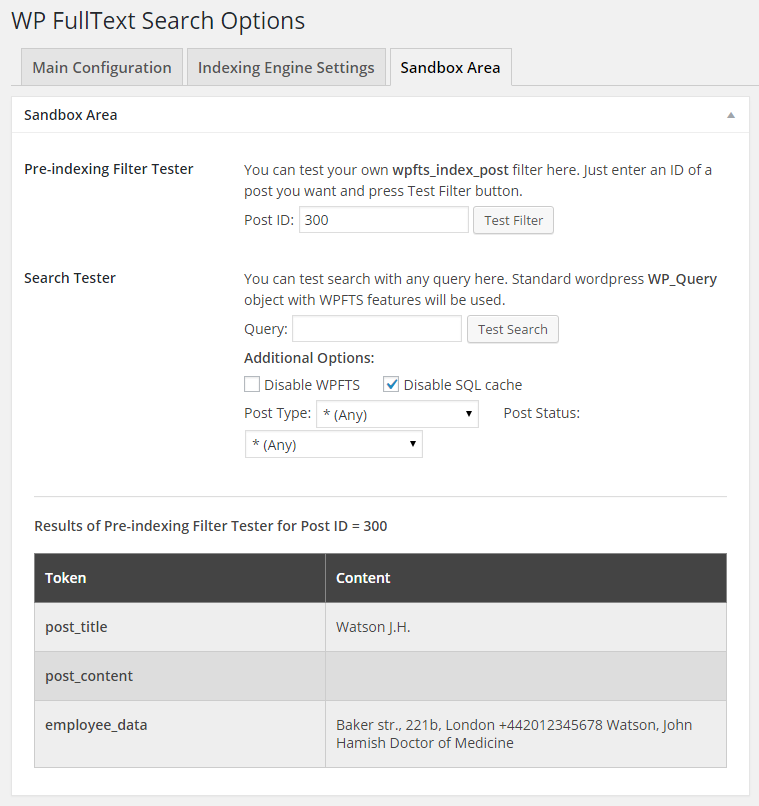
After adding or changing the filter, you need to test how it works. Use the special tab “Sandbox Area” on the WP FullText Search Options page.

Type in the field “Post ID” the ID number of any post of the type “employee”. After pressing the up button “Test Filter” there should be a table with the list of clusters referred to this post made with the filter wpfts_index_post.
From now on all new and altered posts of the type “employee” will be automatically added to the search index along with the data from the chosen meta fields. You can also install the weight coefficient for the created cluster employee_data on the “Main Configuration” tab.
However, all existing posts of the type “employee” won’t be updated in the search index automatically and for their updates, you need to rebuild the search index. Press the button “Rebuild Index” on the tab “Main Configuration”. The same as with the initial indexing, you’ll have to wait until the index update is completed. This operation has to be done each time that you change the filter wpfts_index_post, so changes of the algorithm could be applied to the previously indexed posts.
4.4 Testing the Search Index
With the help of “Sandbox Area”, you can test the search index. In the area “Search Tester” you need to type the phrase in the field “Query” and press the button “Test Search”. The results from the search algorithm will be shown in the table below.
You can use advanced options – limit the type or the status of the search posts, switch off the MySQL cache (it can be useful for testing the speed performance of the search algorithm), and also completely disable WP FullText Search plugin for testing (for example, to compare the plugin’s algorithm with the default text search’s algorithm on WordPress).
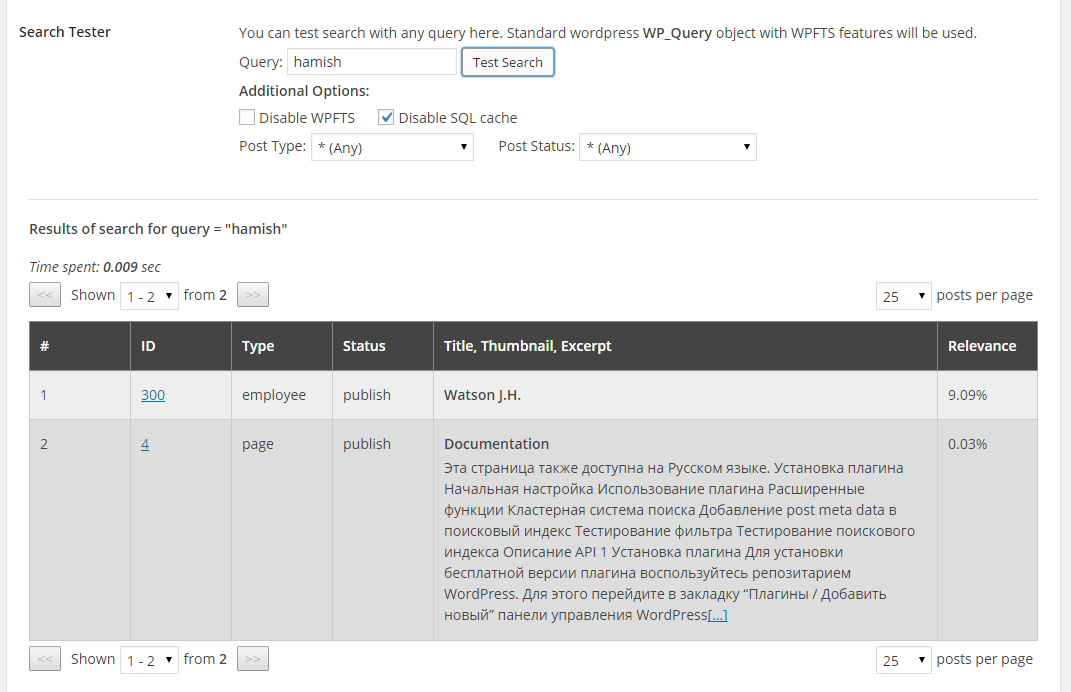
As you can see on the above screenshot, the algorithm has found not just the employee from the example via the sub-field “Watson J.H.”, that is mentioned in the meta-tag, but also the page that you are currently reading because it also contains this sub-field. If you specify the post type (“employee”) the search algorithm will find only the specific post.
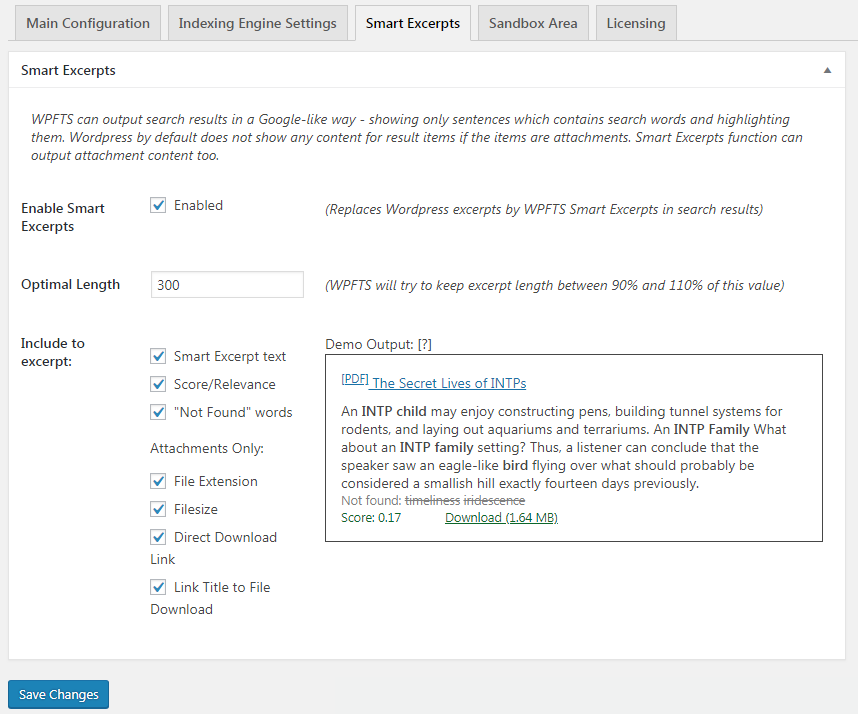
4.5 Smart Excerpts
WPFTS can output search results in a Google-like form. This will show a set of sentences containing search terms instead of the usual excerpt (which is a piece of post content or nothing for attachments). You can justify some relative settings in the “Smart Excerpts” tab.
How does it work?
The principle is based on the get_the_excerpt hook implementation. Normally, default WP themes and most of the 3rd-party themes using the tag the_excerpt(); to insert short post representation to the search result list.
However, WordPress is using a very simple algorithm to calculate the excerpt. It simply cuts first 55 words of the post content out. It is often not very informative for search results. Even more, for attachments, it usually shows only post title, because WP can not extract text from attachments by default.
WPFTS plugin solves this by the smart way. It uses the content of the post or the contents of the file as an input parameter and gently selects from it only those phrases that contain the search terms and outputs these phrases in a condensed form, highlighting the search words.
For attachments, the plug-in additionally displays the following:
- File size and extension
- Relevance score
- Direct download link
- A list of words, which was not found in post/file content.
Notice: since attachments content is only extracted in the Pro version of the plugin, smart excerpts will only work for normal posts in the free version.
This function could be configured deeply by using some special filters (please refer Description of API) and by using your own Smart Excerpt template.
Unfortunately, some popular 3rd-party WP themes do not use get_excerpt() function to show search results or using it the wrong way, that’s why Smart Excerpt does not work for these themes. But we are looking for a workaround to fix that.
4.6 Attachment Processing
WordPress supports the uploading of attachment files natively, but the attachment search is possible only by title/name. One of the most important functions of WPFTS is the search in the contents of attachment files. How does it do this?
WPFTS extracts the text content from attachments and adds it to the indexing core. Then, it uses this indexed content to search for original attachments.
What are file types supported by WPFTS?
At the moment, the plugin can extract and index text from the following file types: PDF, DOC, DOCX, RTF, TXT, HTML, HTM, CSS, and others (with a help of TextMill.io). In the near future, it is planned to enable support for other file types. If you are interested in indexing certain types of files tomorrow – let us know.
How does the plugin extract text from files?
You can use one of the two tools offered.
- TextMill.io service – is an external service, which was developed by our honest partners who created a special tariff plan specifically for WPFTS plugin. The service can extract text from a large number of formats and it does it quickly and efficiently. This method does not use the power of your server, so it will work even on low-cost shared servers. The service is free for users of the Pro version of the plug-in. As a disadvantage, it is worth noting that your files are transferred to the TextMill.io server for processing. And although the connection is protected, and the service itself ensures that files are deleted from its disk immediately after processing, there is no 100% guarantee that the files will not be stolen during transmission. Therefore, if your files contain sensitive information, you could prefer an alternative method.
- Native PHP library is a built-in file parser that uses your server’s power to work and never transfer files to the 3rd-party services. It supports fewer file formats (all Plaintext-based formats like TXT, HTML, CSS, JS) and requires more power of your server (more RAM and more CPU) to work. Also, it has an integrated PDF parsing library, which can extract texts from PDF files with medium quality.
You can also add your own tool to extract text from files using WP filters.
5 API description
This part of Documentation is under development now.
6 Problems and Solutions
This part of Documentation is under development now.